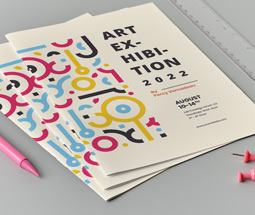
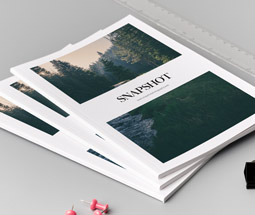
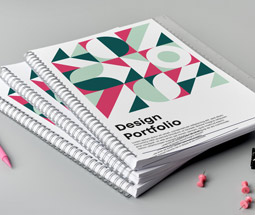
Whether you use Microsoft Office, Adobe or even Google Docs, there are tons of cool tools to help you create a stunning booklet design no matter your skill level. Here are our top tips for making your own booklet from scratch.
How to Make a Booklet in Word
Microsoft Word is a great piece of software for beginners. Follow these steps to create an eye-catching booklet for your business:
Setting up Your Booklet
The first thing you’ll need to do is set up your booklet template. To do this:
1. Go to Layout > Page Setup > Pages > Multiple pages
2. Select the Book Fold option
3. Increase all Margins by 3mm
4. Go to Size and choose your paper size from the drop-down menu
5. Go to View and tick the boxes to show Ruler and Gridlines.
To check that you’ve set up enough space for your full design to print, use our handy bleed guide.
Inserting Images
Images are the perfect thing to show off your business in your booklet, but make sure they have a resolution of at least 300dpi or more to get the best from your design. Here’s how to add images:
1. Go to Insert > Pictures
2. Select the picture you want to include and click Insert
3. Resize and rotate the image by dragging the corners
4. If you want text to fit round your image, right click the picture, go to Wrap Text and select the option you want
To get the best from your images, check their colour with our colour guide.
Inserting Textboxes
If you want text to be positioned in specific areas, the easiest way to achieve this is by creating textboxes:
1. Go to Insert > Text Box and select the style of box you want
2. Move your text box by clicking and dragging it into place
3. Resize your text box by clicking and dragging corners
Once you’ve got your box where you want it, you can type in it like normal.
Inserting Borders
To add borders to your booklet:
1. Go to Design > Page Borders
2. Select the options you want in Setting, Style, Colour, Width and Art
Save Your Artwork
Save your artwork as normal, but also save it as a PDF to embed text and images. To do this:
1. Go to File > Save As
2. Name your file and click the drop-down menu to select file type
3. Select PDF and press Save
How to Make a Booklet in Publisher
Publisher is similar to Word, but it is design-specific, so it can be better for creating booklets.
To set up a booklet up in Publisher, follow these steps:
Using a Template
When you open Publisher, you’ll see a range of templates you can use for your booklet. Browse these and pick the one you want. Once you’ve opened it you can customise colour and select your own text and images.
Alternatively, you can make your own booklet from scratch.
Setting up Your Own Booklet
To get a booklet layout:
1. Go to Page Design > Page Setup
2. Select Booklet from the Layout Type drop-down menu
3. Set Paper Width and Paper Height to desired dimensions – include an extra 6mm on both as your ‘bleed’ area
4. Set Margins of at least 3mm and keep all images and text within them
Inserting Images
To get pictures on your Publisher booklet:
1. Go to Insert > Pictures
2. Select the image you want and click Insert
3. Position your image by clicking and moving it
4. Resize your image by dragging the corners
5. Right click the image and select Wrap Text if you want text to be positioned around your picture
Inserting and Placing Textboxes
To use text in Publisher you have to insert a textbox. To do this:
1. Go to Insert > Draw Textbox
2. Use your mouse to draw textbox, shape and reposition it
3. Go to Format to change the colour and style of the box and your font
Creating Borders
You can use borders to draw attention to text boxes, or your whole booklet. To add them to textboxes:
1. Right-click the textbox and select Format Textbox
2. Choose a Line border for your box
3. Select Fill to give the box a colour
Here’s how to add a page border:
1. Select Shapes and click on the rectangle
2. Draw your border – keep it out of your margin
3. Click on the shape and select Send Backward > Send to the Back on the format tab
4. Select Shape Fill > No Fill
You can change you border style using the Shape Outline option in the Format tab.
Inserting Extra Pages
To add pages to your booklet:
1. Go to Insert > Page > Insert Blank Page
2. Set up margins as above and then add your text and images
Saving Your Booklet
Save your booklet as normal, but then save a version as a PDF. To do this:
1. Go to Save As
2. Select PDF from the drop-down menu and press Save
How to Make a Booklet in Pages
Pages is the easiest software to design your booklet if you’re using a Mac. To get started:
Set up Your Booklet:
1. Open Pages and select Create New
2. Scroll through templates and select a Book option – there are a range in portrait and landscape that are pre-designed or can be left blank
3. Click on the Document icon and choose your paper size
4. Set each margin to 3mm
Inserting Images:
1. Click the Image icon on the toolbar and select the image you want to insert, or drag it into the document from your desktop
2. Drag the image to where you want it and resize using the corner handles
3. Click the Paintbrush icon and Wrap Text to set your text around the images
4. Double click the image and then use the corner handles to crop
Creating Textboxes
1. Select the T icon to insert your text box
2. Double click in the box to type
3. Drag the box into position and resize it using the corner handles
4. If you’re using more than one box you can create a Thread so that your text continues from one box to another as you type, by clicking the circles at the top of your textboxes
Inserting Borders
Add borders to images or textboxes in Pages by:
1. Selecting the Image or Textbox you want to add a border to
2. Click the Paintbrush icon and tick the Border option
3. You can alter the appearance of your border in the Paintbrush icon
To add a page border:
1. Select Shapes and either the Rectangle or Rounded Rectangle
2. Draw the shape where you want your page border to be – keep it in your safe zone
3. Right click on the shape and select Send to Back so it’s behind all your other work
4. Select the Paintbrush > Style then tick Border and untick Fill
5. Choose the line style, colour, thickness and effects to customise your border to suit your design
Save your Booklet
1. Click on the Settings icon and click Download a Copy
2. A dialog box will then pop up asking you to choose a download format – pick PDF. This will then flatten your images and embed your text ready to send to us
How to Make a Booklet in Google Docs
Google Docs is a great free design tool that lets you share your booklet ideas easily. Here’s how to use it:
Set up Your Doc
1. Log in to Google Docs with your normal Google account and create a new doc by clicking on a blank document
2. Go to File > Page Setup
3. Set your size and orientation
4. Add 3mm Margins to your document as a safety zone to work within
Inserting and Placing Images
Adding images will help bring your booklets to life. To get the best results, use pictures with 300dpi resolution or above. To add in Google Docs:
1. Click the Image icon and select the images you want to add
2. Resize and reposition your image using the corner handles
3. Click on the image and select Wrap Text or Break Text to set your image within text – you can then move the picture around freely
4. Select Image Options to adjust the colour, transparency, brightness and contrast of your image
5. Click the Crop icon to cut away parts of the image
Inserting and Placing Textboxes
1. Click Insert and select Drawing from the drop-down menu
2. Select the Textbox icon and draw your dialog box
3. Type the text you want in your box and select font and size
4. Click Save and Close when you’re finished
5. Use your mouse to move and resize the box
6. Double click on your textbox if you need to edit it later
Adding Borders
Here’s how to add a border to an image or textbox:
1. Click on the image or textbox you want to add a border to
2. Click the Pencil to pick a colour for your border
3. Select the Border Weight icon (to the right of the Pencil) to choose the thickness of your border
Here’s how to add a page border:
1. Click Insert then select Drawing from the drop-down menu
2. Select the Shapes icon, then either the rectangle or rounded rectangle and draw in the dialogue box
3. Press Save and Close
4. Resize the box to fit your border
5. Select the Pencil icon to choose your colour, and the Border Weight icon to select the thickness of your border
Saving your Booklet
1. Click on the Settings icon and click File
2. From the drop-down menu, choose Download as, and choose PDF Document. This will then flatten your images and embed your text ready to send to us
How to Make a Booklet in InDesign
InDesign is a great tool if you are ready to step up your designing game, as it is a specialist piece of software. To get started designing a booklet, follow these steps:
Set up your Page Layout and View
1. Select File > New Document
2. Choose your size under Document Pre-Set
3. Add 3mm to your Margins
4. Pick the number of pages you want – you can find the minimum and maximum number of pages we print on in the corresponding FAQ section on the product page.
5. Tick Facing Pages then create your document
Inserting Pictures
• Go to File > Place and pick the image you want – try to use images with resolution of 300dpi or more
• Resize the image by dragging the corner handles
• Select the image and drag it to put it in position
Inserting Textboxes
1. Select Type in the Tools Panel
2. Click and hold where you want the text to appear and drag diagonally to create textbox
3. Type your text in the box and choose colours, fonts and sizes
4. Choose the Select tool to move and resize the box
With InDesign you can create a non-rectangular text box too:
1. Select the Frame tool then click and drag diagonally to create your shape
2. Choose the Type tool and click inside your shape to change it to a text frame
3. Position your frame using the Select tool
Creating Borders
To add a border to a textbox:
1. Click in the textbox
2. Go to the Control Bar and tick the Border box
3. Hold the Option/Alt Key on your keyboard and click the Paragraph Border option on the control panel
4. In the Border tab of the box that has opened you can customise your border type, colour, corner size and shape
Top tip: Make sure the ‘Preview’ checkbox is ticked in the dialog box, so you can see the changes you’re making live in your paragraph.
Save Your Artwork
1. Before you save your artwork, untick the Facing Pages option in File > Document Setup
2. Go to File > Export
3. Select Adobe PDF as your file format
4. This will then trigger the Export PDF Window, where you can set the file up for print.
5. Save your artwork as a PDF with the settings: PDF/X-1a:2001.
If you’re unsure about what booklet type is best for you, contact our customer service team at office@instantprint.co.uk. Alternatively, you can get in touch with us on live chat or over the phone.
For help with setting your artwork up for print, contact your personal artworker on PA@instantprint.co.uk – they’re also available over the phone on 0191 27 27 327. Or, check out our Booklet Artwork Guide here.

.jpg)


